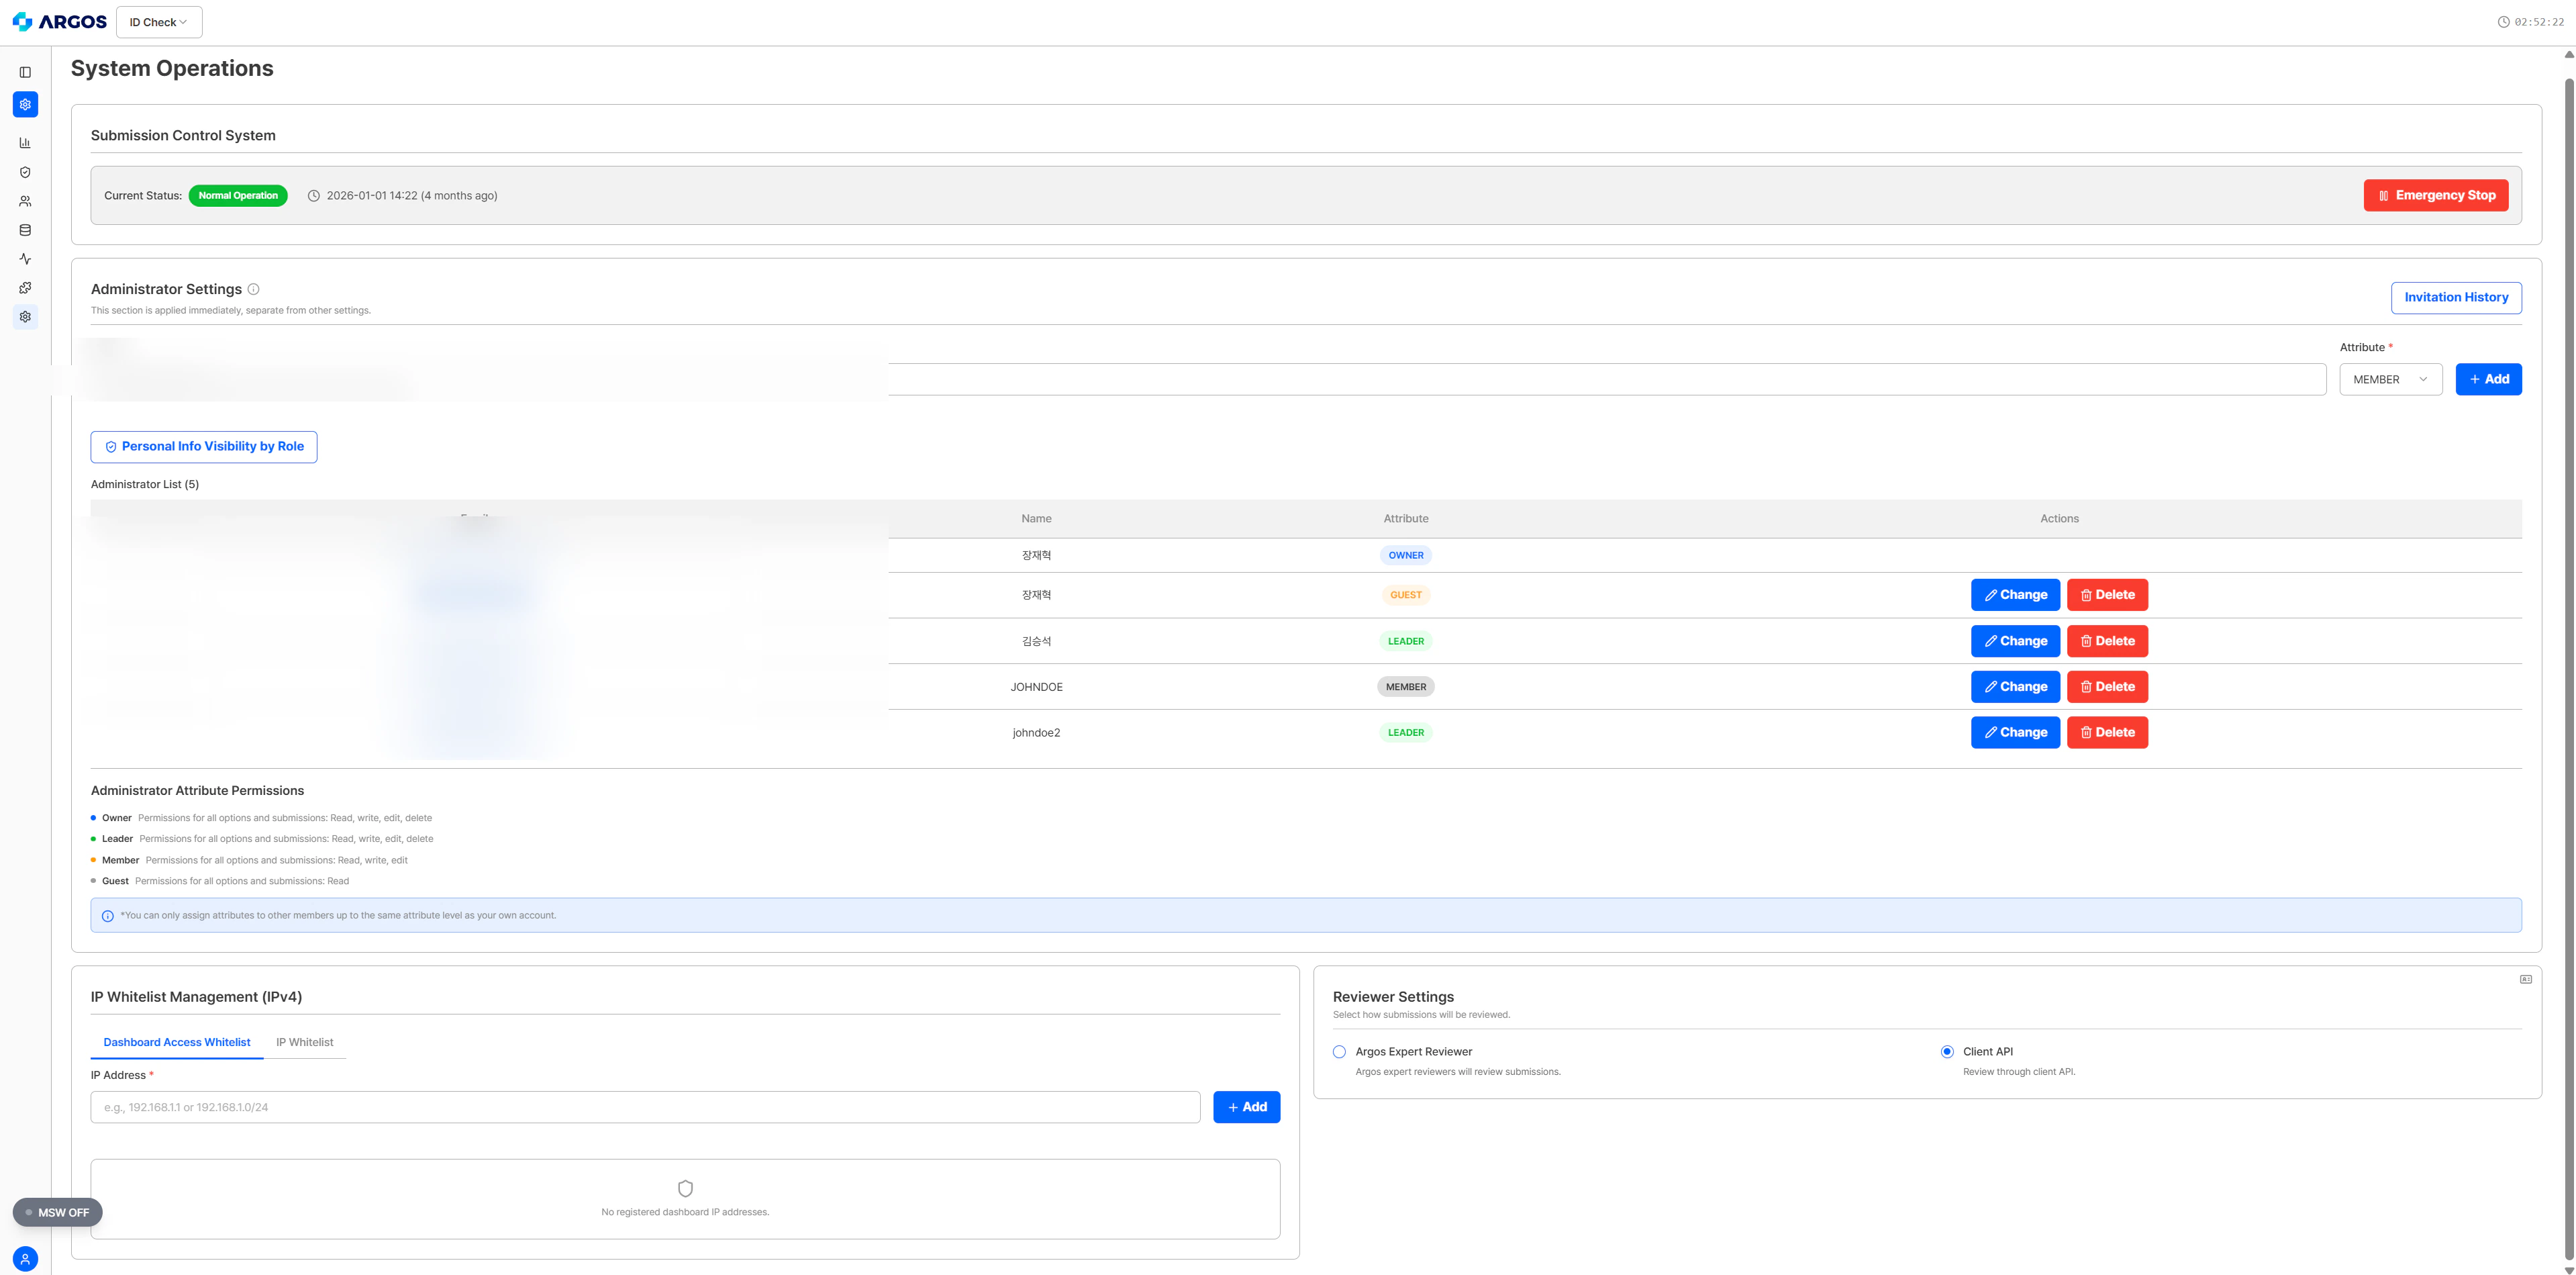
Submission Control System
You can prepare for emergency situations through the submission control system.

| Status | Description |
|---|---|
| Normal Operation | All eKYC processes are operating normally. |
| Emergency Stop | eKYC submissions are stopped. (eKYC submissions via Liveform, submissions via Post/submission) |
Privacy Display Settings
For each role, the visibility of personal information fields in the submission detail view is controlled. Fields that are unchecked are masked for administrators with that role.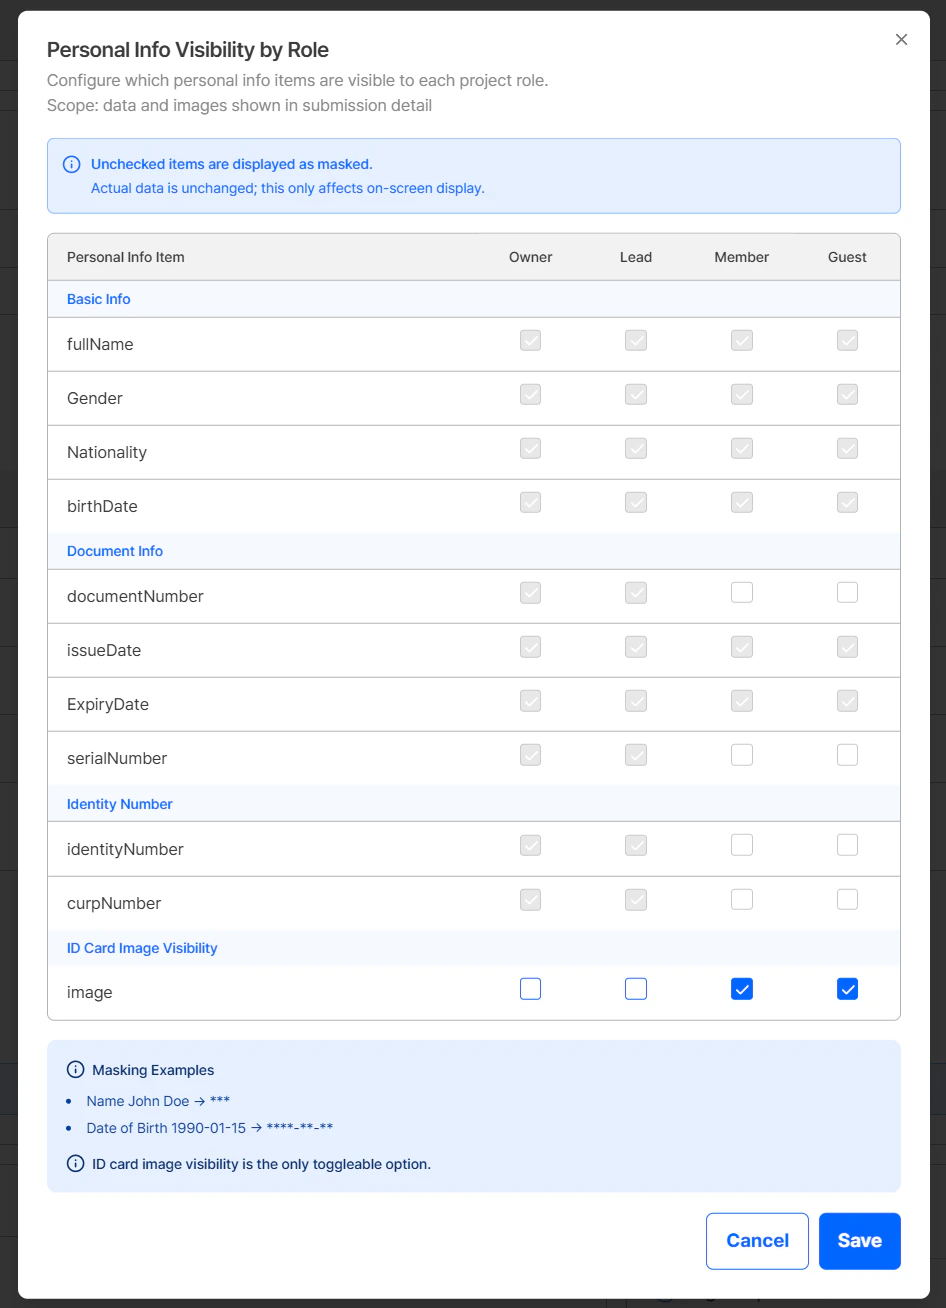
| Category | Fields | Currently configurable |
|---|---|---|
| Basic Information | fullName, Gender, Nationality, birthDate | Settings to be provided later |
| Document Information | documentNumber, issueDate, ExpiryDate, serialNumber | Settings to be provided later |
| Identity Numbers | identityNumber, curpNumber | Settings to be provided later |
| ID Photo | image | Can be toggled on/off |
Currently, only the ID Photo (image) field can be adjusted in the role-based PII visibility settings. The other fields cannot be adjusted yet — configurable settings will be provided later.
Role-based PII masking applies only to what is displayed on the dashboard screen. Actual stored data and API responses are not affected. (e.g., name
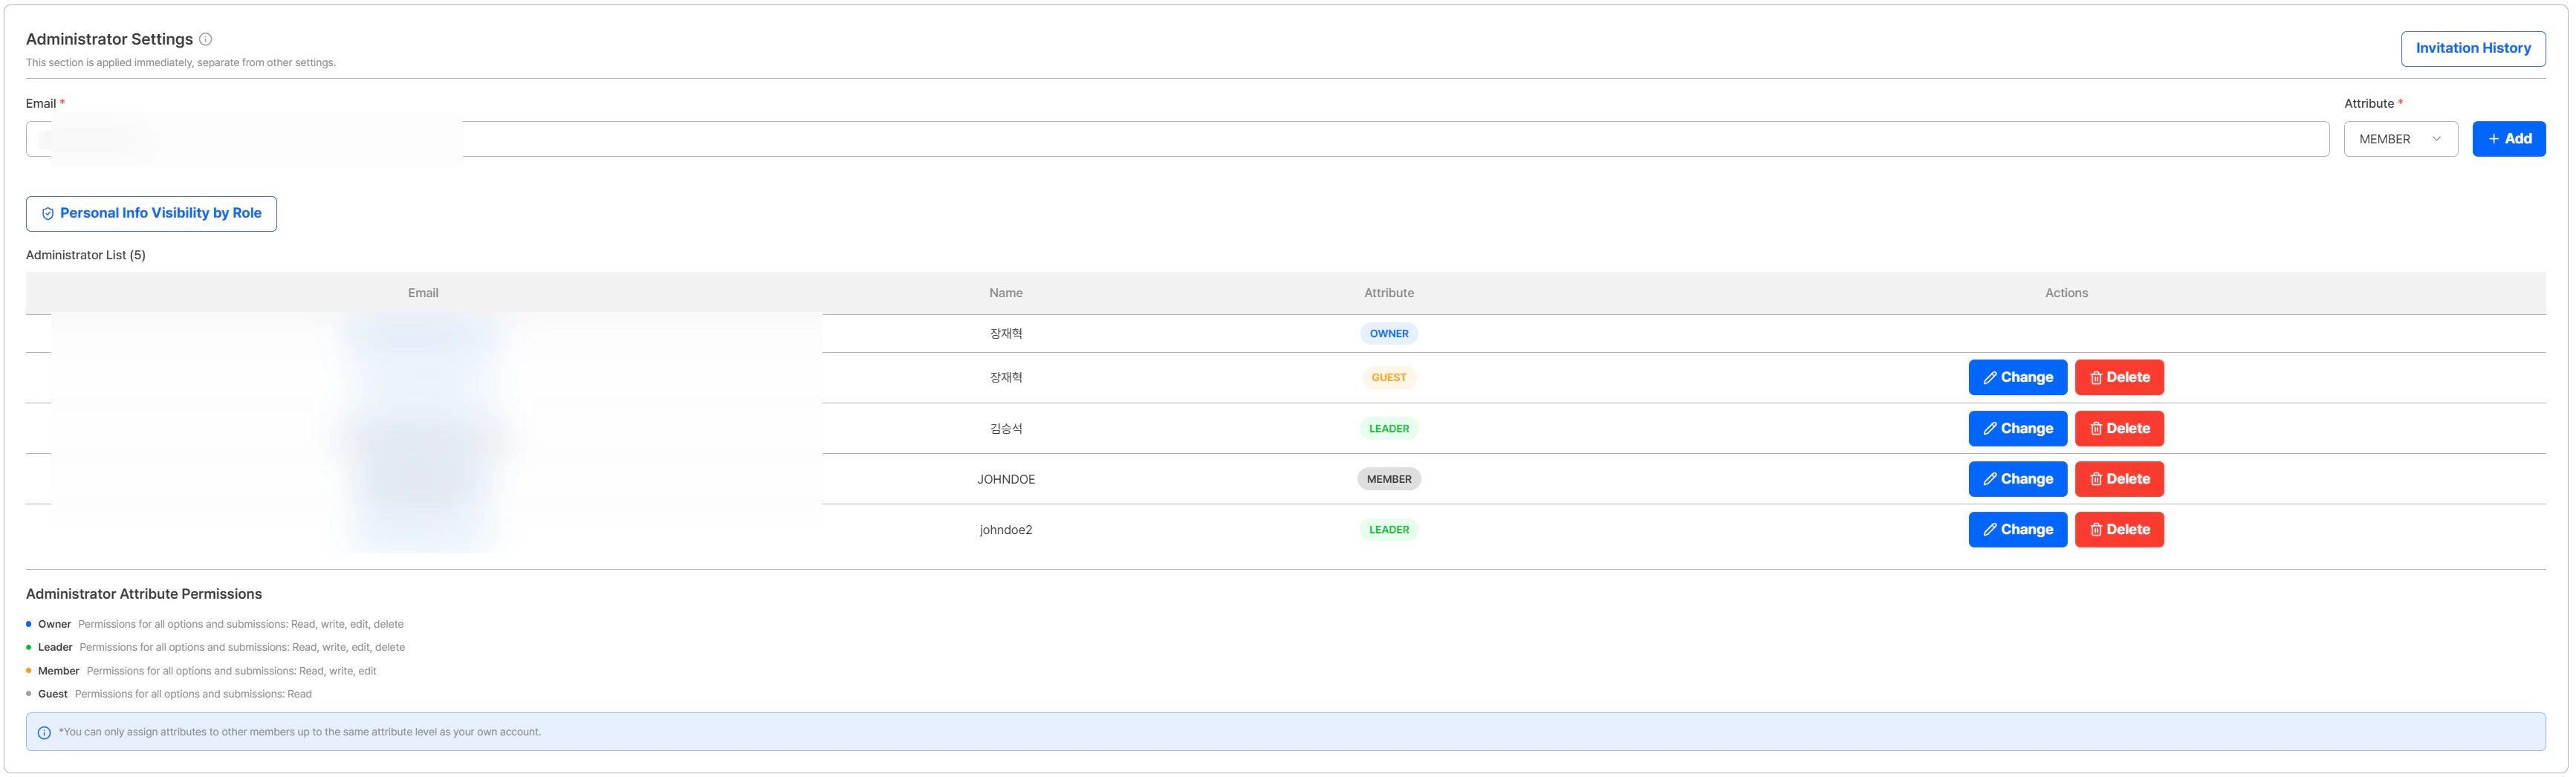
John Doe → ***, date of birth 1990-01-15 → ****-**-**)Administrator Settings
| Role | Read | Write | Edit | Delete |
|---|---|---|---|---|
| Owner | O | O | O | O |
| Leader | O | O | O | O |
| Member | O | O | O | - |
| Guest | O | - | - | - |
When assigning a role to another administrator, you can only grant up to the same role level as your own account. For example, an administrator with the Member role can only assign Member or Guest to others.
- Add Administrator: Enter the administrator’s email and name, then click the + Add button. When adding, assign one of the four roles (Owner/Leader/Member/Guest) to the administrator.
- Remove Administrator: Click the Delete button next to a registered administrator to remove their access permissions.
- View Login Records: Click on an administrator account to view login records for that account.
This section is applied immediately, separate from other settings.
Administrator Invitation
When adding an administrator, the system behaves differently depending on the entered email:| Condition | Behavior |
|---|---|
| User already registered on ID Check dashboard | The user is immediately added to the administrator list. |
| Unregistered user | An invitation email is sent to the entered address. The user is registered as an administrator after accepting the invitation and completing registration. |
Invitation History
Click the Invitation History button to view the invitation history for the project’s administrators.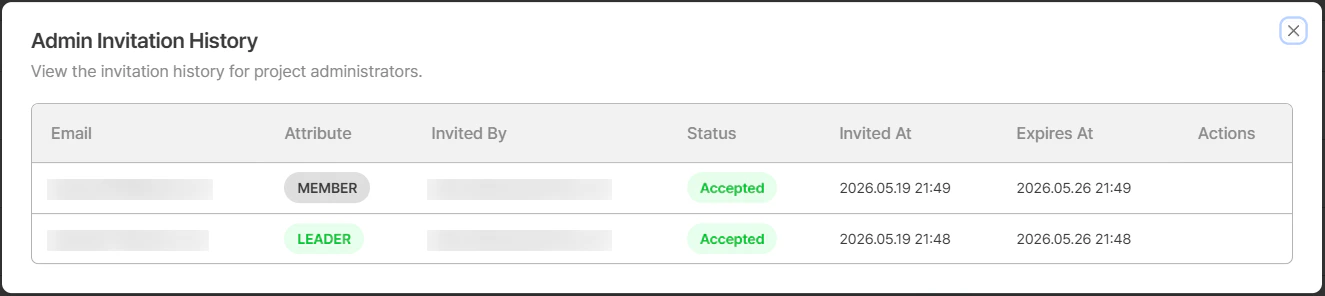
| Field | Description |
|---|---|
| Email address of the invited administrator | |
| Name | Name of the invited administrator |
| Role | Assigned role (Owner / Leader / Member / Guest) |
| Invited By | Email address of the administrator who sent the invitation |
| Status | Invitation status (Invited, Cancelled, Expired, Accepted) |
| Invited At | Date and time when the invitation was sent |
| Expires At | Invitation expiration date and time |
| Actions | For Invited status, a Cancel button is available to cancel the invitation |
The invitation is valid for 7 days from the date it was sent. If the invitation has expired, you can re-invite the user by entering their email and name again.
Reviewer Settings
You can configure who will review submissions that require manual review.
- ARGOS Professional Reviewer: ARGOS reviewers directly review.
(Reviews submissions for pending items within a maximum of 24 hours. For faster review processing, please contact sales.) - Client API: The customer becomes the review entity and reviews directly.
You can directly modify kycStatus for pending items in the dashboard, and use the Review API for faster processing.
Review is needed when the submission score falls below the ARGOS Score threshold value, resulting in a pending item.
IP Whitelist Management (IPv4)
You can restrict dashboard viewing and API access to only specified IP addresses.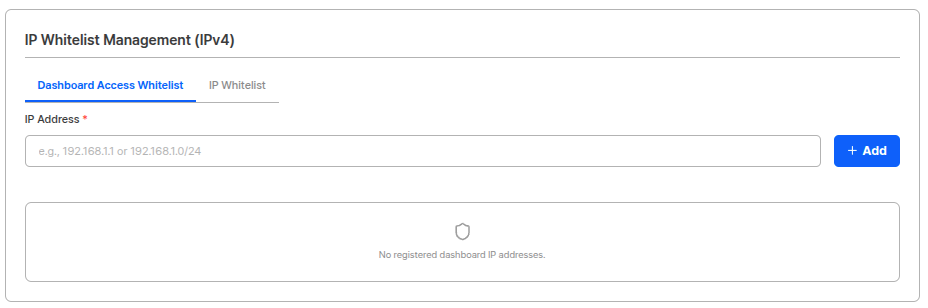
- Dashboard Access: Dashboard login is only possible from registered IPs.
- API Access: API calls are only possible from registered IPs.
- Activate the IP whitelist function.
- Enter IPv4 addresses to allow. (One per line)
- Click the save button to apply settings.
IP Whitelist UsageSetting up an IP whitelist can block unauthorized access from outside and strengthen security. It is recommended to set this up when handling sensitive data including customer information.
Related Documentation
Project Information
View project basic information settings.
Integration Information
View API key, webhook settings, and return URL settings.
Security Settings
View data protection and security settings.
Access Control
View private mode and token management settings.